
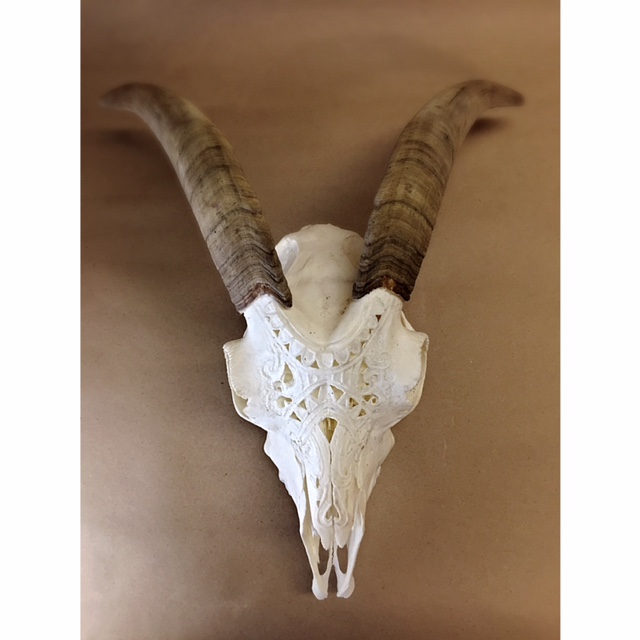
This week’s project is a departure from my traditional work, carved goat skull. Yeah... sounds so manly. RAWWRRRR!
Continue reading if you want a little insight into its creation. I tried not to get too graphic, but reader beware.
Let me begin at the beginning. A few months ago my lovely wife returns home from a trip to the farm with a bag full of goat skulls, horns and a few miscellaneous bones, mostly all still attached to one another. Needless to say the aroma was, well, not even something febreeze could mask. I know because she tried. OK, even though I’m so very tempted to describe the sight and smell in immense detail I’ll refrain. You can thank me when you see me.
So a long story short the first step in beginning this week’s project is to clean, sanitize and remove any straggling fur. Yes, you guessed it a big pot of boiling hydrogen peroxide and water. Add the skulls and bones, boil for an hour and half and voila... bleached, pristine, white skulls. The whole time this is happening I’m thinking to myself, “self, I wonder what my neighbors would think if they caught a glimpse of me now”. Every movie scene where someone needs to get rid of a body goes through my mind. And the bubbles oh so many bubbles. All in a t-shirt and boxers.
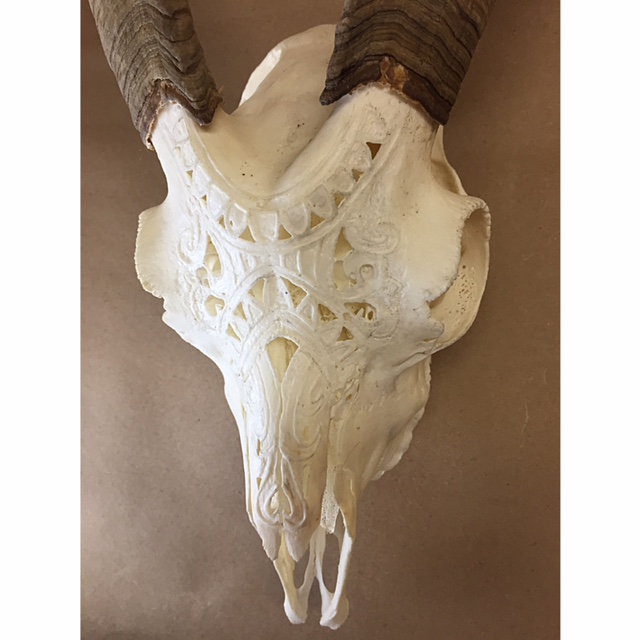
Now that the skulls are cleaned and several days have passed, I can stomach going back into the shop again. Creation is a messy and sometimes smelly affair, but nonetheless, I decided on a design and sketched it onto the skull. I used a Dremel, which is a tool similar to a dentist drill, and a variety of different bits along with a steady hand. Several mornings later you have the above. For my first attempt, I’m actually really proud of how this has turned out. I learned that goat skull is really thin and the crispness of the design would pop in a thicker skull.
Hmmm... deer season is just around the corner.